
Welcome to another Lego Mindstorms Robot Inventor Kit resource. In this article, we will explore the MVP turret extension, looking at how the model works and the code behind it. If you would like to see step by step coding instructions and commentary, please click the YouTube video link at the bottom of the page to access our video resources.
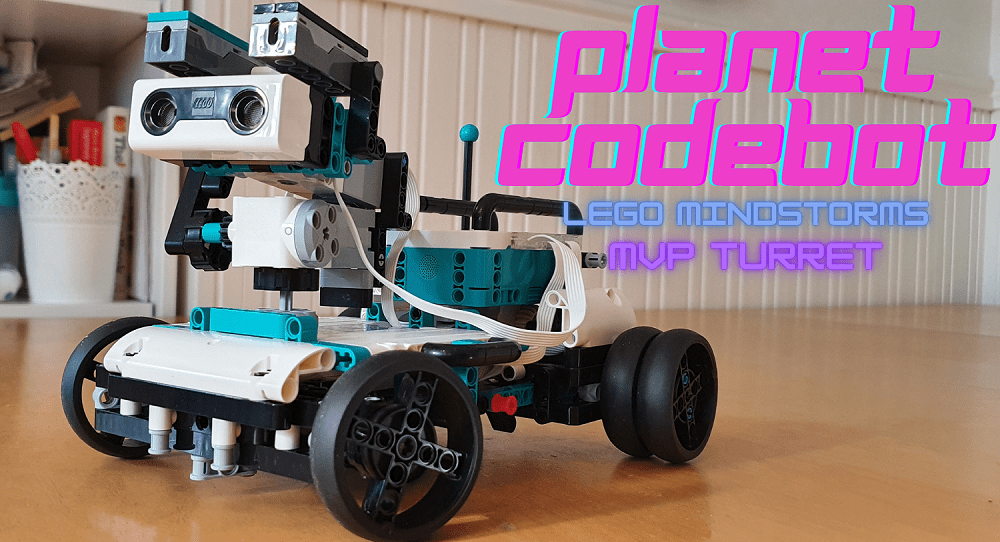
I have been playing around a lot with MVP from robot inventor recently, and I have to say that the turret is bar far my favourite design of all the ones covered to this point. This model is fun and really interesting to build. The turret and extra targets work incredibly well and really make the most of the kit’s ability to use PlayStation and Xbox controls.
Design
The turret extension continues on from the MVP base model. The entire mechanism can be built separately and attaches to MVP very easily.
The turret attaches to the same motor that controls the front wheel steering arm. This allows the user to control steering and the turret direction with a single control input. The turret will point in the opposite direction to the wheels. Point the wheels left and the turret will face right. It takes a little bit of time to get used to this control scheme, but it works well enough. By using a drive, stop, aim, shoot strategy, it is possible to be incredibly accurate with the launchers.


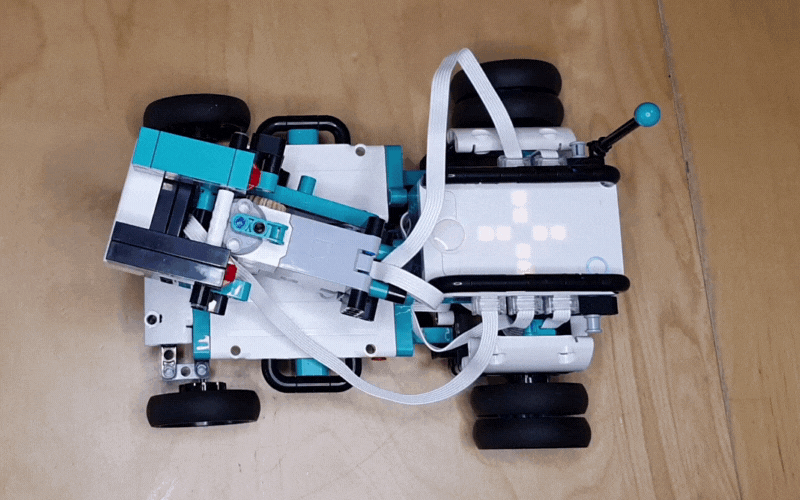
From a top down perspective, it is possible to see how the robot activates each rocket. Pressing the ‘launch’ button sends an instruction to the motor. A small block attached to the motor spins left or right to push the firing pin for each rocket.
The Code
The code for the turret will begin in a similar fashion to other MVP designs. The first step is to choose the hub orientation and calibrate the robot to MVP mode.
Motor C will be used to raise and lower the turret for aiming. Add motor speed blocks to control the speed the motor moves at later on. Like with the crane build, the motor speed doesn’t need to be very fast. A slower speed will result in a more controllable robot.
In this example, I am using the Dualshock 4 controller to give the robot instructions. Motor D is being used to control both the steering and the left and right directions for the turret. Remember that the steering and turret directions are controlled by the same motor.
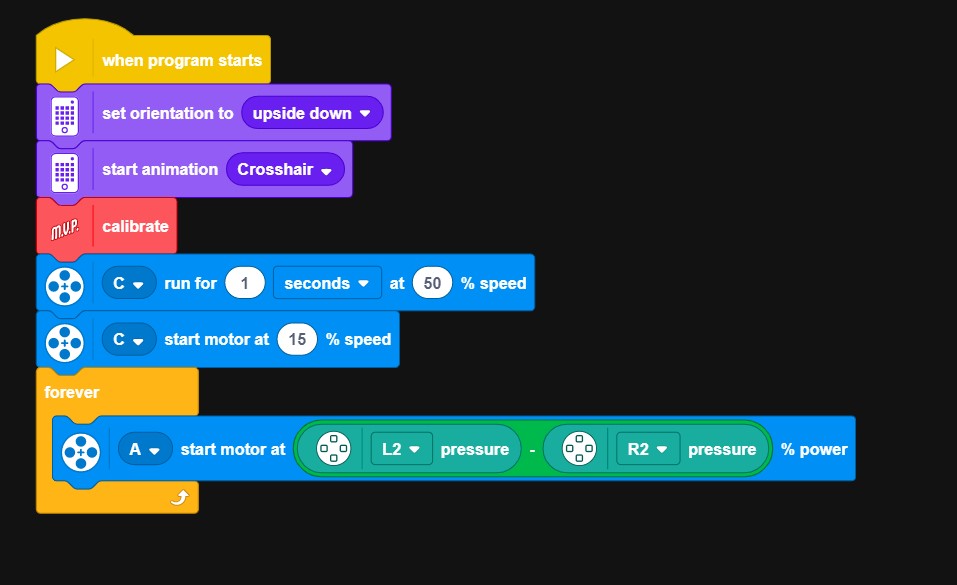
The next step is to write the code that will control the turret and the wheels. The turret can move left, right, up and down. Make sure you pay careful attention to the motor speed in this part.
When the left button is pressed on the controller, Motor A will turn at 60% speed. However, when the right button is pressed, we need the motor to turn in the opposite direction. To achieve this, use a speed of minus 60. This will result in the motor moving backwards (or in our case right) at the same speed.
After completing the left and right controls, it is time to tell the robot how to move the turret up and down. This allows for better aim and a much wider area of attack. Motor C controls the vertical aiming. The motor speed for Motor C was set in the first block of code, so there’s no need to do this again. Use the blue motor direction blocks to tell Motor C to turn counter clockwise when pressing up and clockwise when pressing down on the controller.
Before moving on, it is important to add a 5th block of code to tell the robot what to do when no input is being provided. In the example, I have used the ‘broadcast’ button with the word ‘stop’. The ‘stop’ instruction has been defined to tell both Motor A & motor C to stop moving. Remember, if you don’t include this part in your code, the turret and steering will continue to perform the last action you gave them, until either a new instruction is given or the motor can no longer move in that direction. This makes the robot very difficult to control.

The final step is to program MVP to fire the left and right rockets on command. In the example, the square and circle buttons on the controller are being used to trigger each launcher. When the buttons are pressed, motor D is going to start at either 100% speed or -100% speed. Remember, using minus makes the motor turn in the opposite direction.
Now you can add some sound and light effects to go alongside the actions. Before finishing, add one final block of code to reset the position of motor D. This will place the motor back into its starting position after each shot is fired, meaning that you don’t need to do this manually.

The Finished Code
Great work. If you have followed all of the instructions , you should now have a fully working robot.

The finished code for MVP Turret.
Now that you have a fully working robot, there are a number of follow on activities that could be done.
The targets (which are also in the instructions) are a great opportunity to introduce a competitive element to your activity. Have teams try to knock all the targets down the quickest, or from the furthest distance.
Another extension activity to take this build further is to try and automate the MVP turret to fire automatically, either when it senses a certain colour or movement.
YouTube Build & Code Guide