Welcome to another Planet CodeBot tutorial resource. Today we will focus on building and coding the crane extension for the MVP robot from the new Lego Mindstorms Robot Inventors Kit. This is a quick and simple activity with a very low skill entry point and endless opportunity to expand and grow, making it perfect for Primary/Elementary aged students.
Basic setup
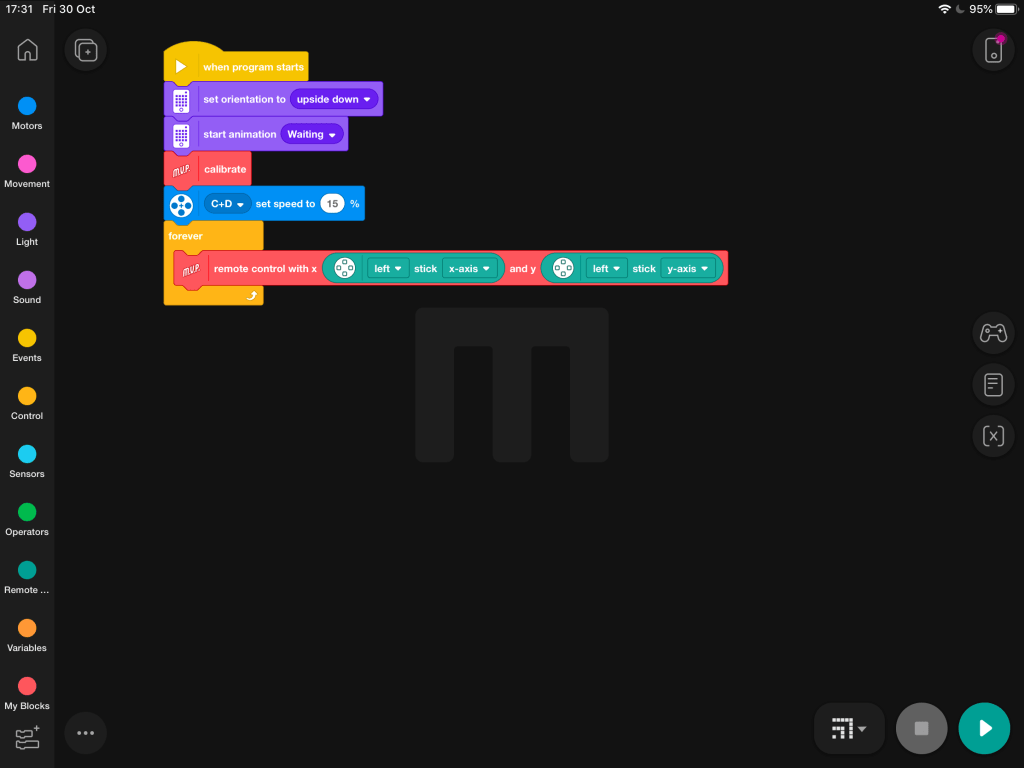
The first step is to calibrate the intelligent hub to MVP mode. We can use the built in robot bricks to shorten this process considerably. At this point, it is also worth adding a motor speed control brick for the C & D motors. These motors control the crane, so we don’t want them to be too fast. Set the speed at around 15-25% for the best results.
Before we move on, use a red MVP remote control brick to state how you want to move your robot. We are using a PlayStation 4 controller in this example. Lego Mindstorms Robot Inventor Kit supports Playstation & Xbox controllers out of the box. To use this feature, simply tick the option/s from the extensions area in the bottom left corner of the coding space. Add your green control bricks to the code to state which analogue stick you wish to use to drive your robot.
Controlling the Crane
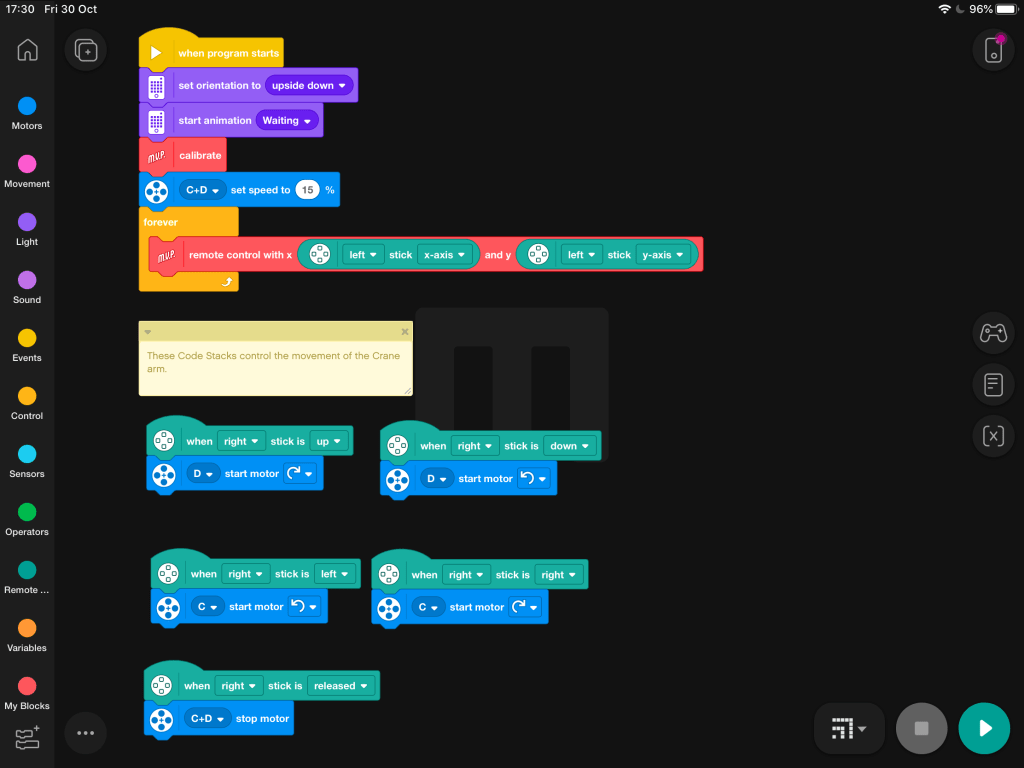
The next step is to tell the program how you want to control the crane. The MVP crane used two motors. The C motor controls the left and right directional movement of the crane. The D motor controls the reaching and retracting movements of the crane arm.
It is also important to add an extra control block to tell the robot what to do when the crane controls are not being used. This way, the crane will only move when we command it to. If you forget to add this block, the crane arm will continue to follow the last instruction it was given until either A) it receives another instruction, or B) it can no longer move in that direction. This makes controlling the robot far harder.
Adding Some Sparkle
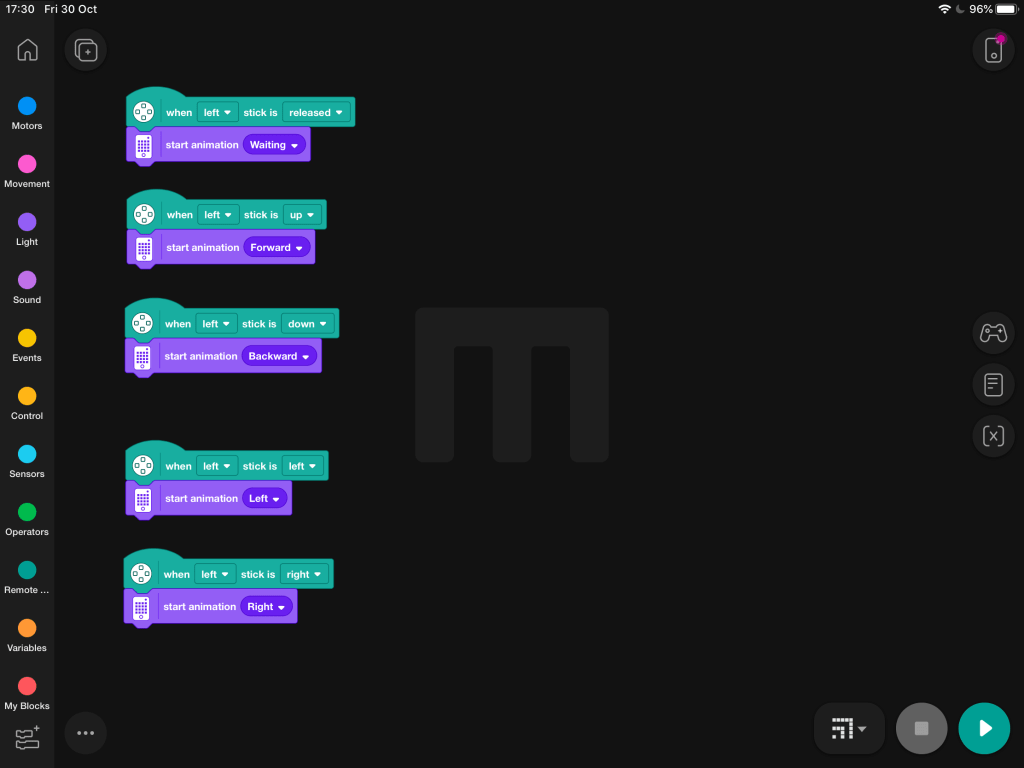
While it isn’t necessary to add animations to your code, it would certainly be a shame to let the LED matrix just go to waste. We have specified five different animations for MVP to follow, with each one being linked to a button command. Whatever MVP is doing, there is now an animation to go along with it.
The Finished Code
You have now completed all the steps necessary to code the MVP crane arm. Connect your controller and hit that play button to test out your work.
This isn’t the end though. From this point, there are dozens of ways to extend and improve upon your work. Here are a few ideas for extension activities that will really challenge your fastest learners:
- Add sounds to match the movements.
- Use the colour sensor to make MVP react to different colours.
- Automate the crane arm to pick up objects when it detects them.

The Full Tutorial
Check out our video tutorial for a more in depth look at the build and a step by step guide to coding.